
Last week, my friends Andy Owens and Richard Cammett (accompanied by the lovely Abby Smith — and our two dogs Willow and Ted — in the car) rode bikes from Manhattan to Montreal. The boys were pros, having done the trip from Boston in their college years. I was a total noob, who definitely struggled, but am proof that you don’t need to be a diehard cyclist to plan your own biking adventure.
I skinned both knees, got some gnarly bruises and even sat out for portions of the trip. But, as they say, you live, you learn. Here’s how to plan your own long distance cycling micro-adventure — minus the physical injuries.
Step 1. Pick your destination.
Choosing your cycling destination can be as systematic as a lottery raffle. We headed to Montreal because the boys had already made the trek from Boston several years before. If you want a little more order than throwing darts at a map, consider the following:
- How long do you have to travel? Are we talking a weekend or a full week off of work? Also, ask yourself if you’d like any rest days and how much time you’d like to spend at your destination.
- How many miles do you want to log every day? We rode roughly 100 per day (although I cheated and jumped in the car for dozens of miles here and there). I wouldn’t suggested more than 80 for beginner cyclists, but if you’d like to stop and sightsee along the way, you can always bump it down to 50. Then, crunch the numbers and figure out how far you can travel.
- Pick a place that’s exciting to you for some reason. For us, Montreal was a lively city AND we got to cross the Canadian border (which makes it feel like you’ve logged some serious miles). Maybe you want to head south because you’re a diehard BBQ fan or maybe a band you like is playing in a city a couple hundred miles away. Choosing a destination that excites you is key to making all of your hard work feel worth it in the end.

Step 2. Get your gear.
I started the trip with virtually nothing, not even a bike, meaning I learned the very basics. Before you head out to REI or EMS, determine if you’ll have car assistance or not. Without a car, you’re going for the lightest, most minimal luggage ever (we’re talking dirty cycling shorts every day), but with a car following you, you have a lot more flexibility in terms of what you pack. We were lucky enough to have car assistance. This is the gear we couldn’t have succeeded without:
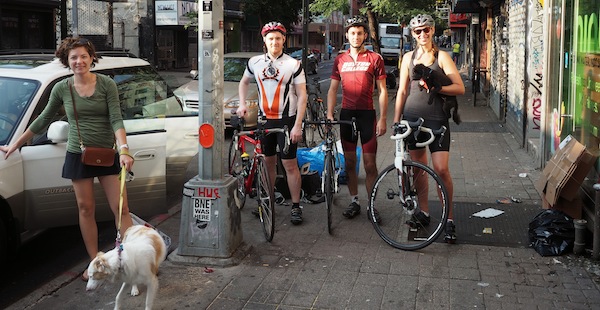
- A bike: I’m sure most people interested in pedaling across the country not only already have a bike, but also know a lot more about them than I do. If you don’t, people like these guys can certainly help you out. Here’s what I learned from my trusty pals and my own experience: The lighter, the better (read: carbon fiber). Correct fit counts (ask the workers at the shop to help you with this one). Electronic gear-shifting systems are seriously smooth. And bikes are majorly expensive. I was lucky enough to get a BMC granfondo on loan that fit all of my above recommendations. It was incredibly fast, comfortable and easy to ride. It’s also worth more than my car and WAY out of reach had I needed to buy it myself.
Cost: About $700 – however many thousands of dollars you’re willing to spend - Clip-in pedals: These are those small pedals that attach to cycling shoes. They allow you to pull, as well as push, with each pedal stroke. They’re essential for long distance trips because they distribute your leg power more efficiently and make your pedal rotations much more effective.
Cost: I spent about $250 on both the shoes and pedals - Bike shorts: Trust me on this one. Your butt will thank you later.
Cost: Around $30 - Cycling gloves: These prevent blisters from the handlebars. They are 100 percent necessary. Go for lightweight ones with vents if you’re doing a summer ride. Sweaty hands are no fun.
Cost: Roughly $25 – $50 - Spare tubes: I packed three spares for our 400-mile trip and didn’t use one. One of the guys, on the other hand, blew through four on the first day. It’s better to err on the side of caution with these.
Cost: $8 per tube - Spare tire: This is wise if you’re riding over a few hundred miles. I didn’t use mine, but one of the guys did. If you’re riding a route without bike shops along it, you probably want to pick one up before your trip.
Cost: $50 – $70 - Sunglasses: Not only will these shade your eyeballs from the sun, but they’ll also protect them from wind, bugs, rain and whatever else may be flying through the air. You don’t necessarily need to invest in cycling glasses – just make sure they fit under your helmet comfortably.
Cost: $25 – $300 - Either a jersey or saddle bag (or both): These carry your snacks, spare tubes and whatever else you’re bringing along.
Cost: $40 – $60 - Helmet: Duh.
Cost: $50 – $250
Step 3. Train. Hard.
This is the step that I made the biggest mistake on. I definitely didn’t train hard enough. Riding to work is not enough unless your commute is 50 miles. Start small with 15-mile rides and work your way up to the distance that you plan to ride every day on your trip. Also, unlike training for a marathon, at first you’ll want to allow 24 to 48 hours between long rides to let your muscles recover. But eventually, you’ll want to ride long distances back-to-back because that’s what you’ll do on your adventure. I started training about two months before the trip and that was definitely not enough, even with hard training. For a newbie setting out on a 400-miler, I’d suggest at least four months of prep. You may even want to Google around for a set training program (this 20-week one looks pretty legit). Something else that I learned the hard way? Clip-in pedals aren’t as easy as they look if you haven’t used them before so practice ahead of time.
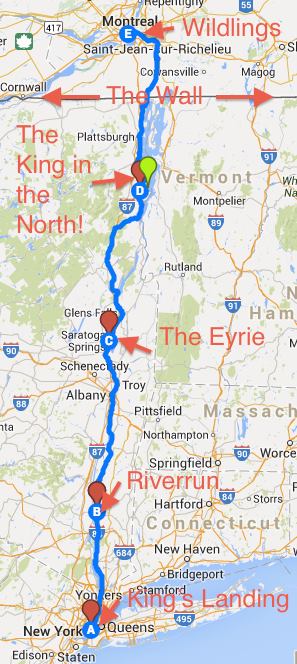
Step 4. Plan your route.
Google Maps offers mostly reliable cycling directions, and I’d suggest using this to plan your route. We camped along the way, using sites found at state parks or from this awesome site. You could also stay in hostels, use Couchsurfing or Warm Showers, which is pretty much the cycling equivalent. My one word of advice would be to plan your stops directly along your route. Ten extra miles may not seem like a lot now, but it sure feels like it after you’ve already logged 90.
Step 5. Pack your grub.
How you approach this part is pretty personal. We basically lived off of Clif bars and energy gels, with a daily diner lunch. We also packed freeze-dried meals for camping. I always like to cook something that’ll reheat well (in this case, beans, chicken and rice), freeze it the night before the trip and bring it along to heat on a camping stove or fire the first night. That way, you’re not living on Ramen the entire time. Keep in mind that eight hours of cycling burns around 4,500 calories, so pack plenty and keep a couple granola bars on you at all times. Also, account for water, especially if you’re camping at sites without potable water. I filled up my two 20-ounce bottles every 25 miles or so.
Step 6. Map out breaks.
Don’t pedal through the miles so quickly that you can’t stop and enjoy the scenery. We stopped after day three of our four-day ride to take a full 36 hours off of the bike seats. Luckily, the boys had a friend from college who worked on a farm in upstate New York. We spent a day weeding crops, feeding pigs and chowing down on her amazing, homegrown meals. I’d highly suggest planning out breaks like these along the way. They make all of those miles more bearable and will often be the most memorable parts of your cycling micro-adventure.
![Race Across America (RAAM) [Race Profile]](https://www.nerverush.com/wp-content/uploads/2012/02/RAAM2011-route-picture-final.jpg)
