
It’s a common crash on this turn of the famous Mulholland Highway in Los Angeles. Yikes! Both cyclists are OK.
Category: Wheel
-

How to Plan a Micro-Adventure on Your Bike
Last week, my friends Andy Owens and Richard Cammett (accompanied by the lovely Abby Smith — and our two dogs Willow and Ted — in the car) rode bikes from Manhattan to Montreal. The boys were pros, having done the trip from Boston in their college years. I was a total noob, who definitely struggled, but am proof that you don’t need to be a diehard cyclist to plan your own biking adventure.
I skinned both knees, got some gnarly bruises and even sat out for portions of the trip. But, as they say, you live, you learn. Here’s how to plan your own long distance cycling micro-adventure — minus the physical injuries.
Step 1. Pick your destination.
Choosing your cycling destination can be as systematic as a lottery raffle. We headed to Montreal because the boys had already made the trek from Boston several years before. If you want a little more order than throwing darts at a map, consider the following:- How long do you have to travel? Are we talking a weekend or a full week off of work? Also, ask yourself if you’d like any rest days and how much time you’d like to spend at your destination.
- How many miles do you want to log every day? We rode roughly 100 per day (although I cheated and jumped in the car for dozens of miles here and there). I wouldn’t suggested more than 80 for beginner cyclists, but if you’d like to stop and sightsee along the way, you can always bump it down to 50. Then, crunch the numbers and figure out how far you can travel.
- Pick a place that’s exciting to you for some reason. For us, Montreal was a lively city AND we got to cross the Canadian border (which makes it feel like you’ve logged some serious miles). Maybe you want to head south because you’re a diehard BBQ fan or maybe a band you like is playing in a city a couple hundred miles away. Choosing a destination that excites you is key to making all of your hard work feel worth it in the end.

Andy taking a water break (cred: Abby Smith) Step 2. Get your gear.
I started the trip with virtually nothing, not even a bike, meaning I learned the very basics. Before you head out to REI or EMS, determine if you’ll have car assistance or not. Without a car, you’re going for the lightest, most minimal luggage ever (we’re talking dirty cycling shorts every day), but with a car following you, you have a lot more flexibility in terms of what you pack. We were lucky enough to have car assistance. This is the gear we couldn’t have succeeded without:- A bike: I’m sure most people interested in pedaling across the country not only already have a bike, but also know a lot more about them than I do. If you don’t, people like these guys can certainly help you out. Here’s what I learned from my trusty pals and my own experience: The lighter, the better (read: carbon fiber). Correct fit counts (ask the workers at the shop to help you with this one). Electronic gear-shifting systems are seriously smooth. And bikes are majorly expensive. I was lucky enough to get a BMC granfondo on loan that fit all of my above recommendations. It was incredibly fast, comfortable and easy to ride. It’s also worth more than my car and WAY out of reach had I needed to buy it myself.
Cost: About $700 – however many thousands of dollars you’re willing to spend - Clip-in pedals: These are those small pedals that attach to cycling shoes. They allow you to pull, as well as push, with each pedal stroke. They’re essential for long distance trips because they distribute your leg power more efficiently and make your pedal rotations much more effective.
Cost: I spent about $250 on both the shoes and pedals - Bike shorts: Trust me on this one. Your butt will thank you later.
Cost: Around $30 - Cycling gloves: These prevent blisters from the handlebars. They are 100 percent necessary. Go for lightweight ones with vents if you’re doing a summer ride. Sweaty hands are no fun.
Cost: Roughly $25 – $50 - Spare tubes: I packed three spares for our 400-mile trip and didn’t use one. One of the guys, on the other hand, blew through four on the first day. It’s better to err on the side of caution with these.
Cost: $8 per tube - Spare tire: This is wise if you’re riding over a few hundred miles. I didn’t use mine, but one of the guys did. If you’re riding a route without bike shops along it, you probably want to pick one up before your trip.
Cost: $50 – $70 - Sunglasses: Not only will these shade your eyeballs from the sun, but they’ll also protect them from wind, bugs, rain and whatever else may be flying through the air. You don’t necessarily need to invest in cycling glasses – just make sure they fit under your helmet comfortably.
Cost: $25 – $300 - Either a jersey or saddle bag (or both): These carry your snacks, spare tubes and whatever else you’re bringing along.
Cost: $40 – $60 - Helmet: Duh.
Cost: $50 – $250
Step 3. Train. Hard.
This is the step that I made the biggest mistake on. I definitely didn’t train hard enough. Riding to work is not enough unless your commute is 50 miles. Start small with 15-mile rides and work your way up to the distance that you plan to ride every day on your trip. Also, unlike training for a marathon, at first you’ll want to allow 24 to 48 hours between long rides to let your muscles recover. But eventually, you’ll want to ride long distances back-to-back because that’s what you’ll do on your adventure. I started training about two months before the trip and that was definitely not enough, even with hard training. For a newbie setting out on a 400-miler, I’d suggest at least four months of prep. You may even want to Google around for a set training program (this 20-week one looks pretty legit). Something else that I learned the hard way? Clip-in pedals aren’t as easy as they look if you haven’t used them before so practice ahead of time.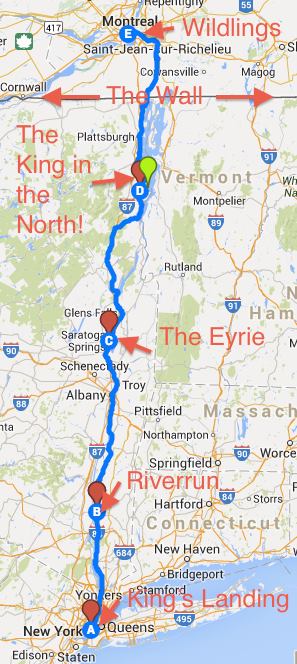
Our route, in Game of Thrones style (cred: Andy Owens) Step 4. Plan your route.
Google Maps offers mostly reliable cycling directions, and I’d suggest using this to plan your route. We camped along the way, using sites found at state parks or from this awesome site. You could also stay in hostels, use Couchsurfing or Warm Showers, which is pretty much the cycling equivalent. My one word of advice would be to plan your stops directly along your route. Ten extra miles may not seem like a lot now, but it sure feels like it after you’ve already logged 90.Step 5. Pack your grub.
How you approach this part is pretty personal. We basically lived off of Clif bars and energy gels, with a daily diner lunch. We also packed freeze-dried meals for camping. I always like to cook something that’ll reheat well (in this case, beans, chicken and rice), freeze it the night before the trip and bring it along to heat on a camping stove or fire the first night. That way, you’re not living on Ramen the entire time. Keep in mind that eight hours of cycling burns around 4,500 calories, so pack plenty and keep a couple granola bars on you at all times. Also, account for water, especially if you’re camping at sites without potable water. I filled up my two 20-ounce bottles every 25 miles or so.Step 6. Map out breaks.
Don’t pedal through the miles so quickly that you can’t stop and enjoy the scenery. We stopped after day three of our four-day ride to take a full 36 hours off of the bike seats. Luckily, the boys had a friend from college who worked on a farm in upstate New York. We spent a day weeding crops, feeding pigs and chowing down on her amazing, homegrown meals. I’d highly suggest planning out breaks like these along the way. They make all of those miles more bearable and will often be the most memorable parts of your cycling micro-adventure.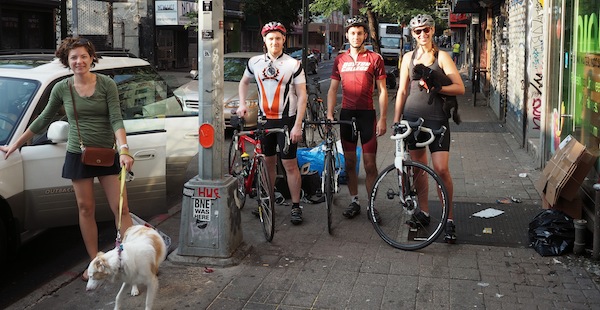
From left to right: Abby S., Willow, Andy, Richard, me, Ted (cred: Chris Robles) -
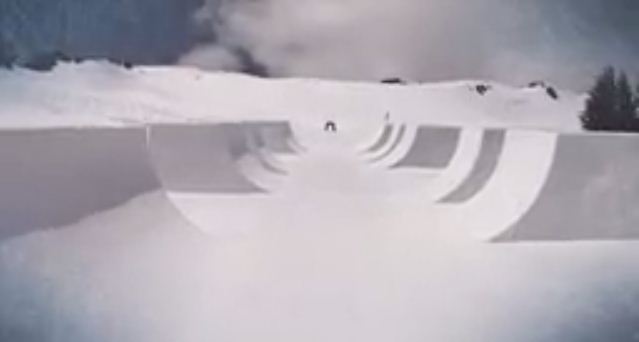
National Geographic: Mountain Movers Trailer
Has anyone watched Mountain Movers on the National Geographic channel? Might be a cool behind-the-scenes look at the kind of work that goes into making terrain parks on big mountains.
-

Behind the Scenes: ‘Mad’ Mike Conquers New Zealand’s Crown
A behind the scenes look at Mike Whiddett drifting New Zealand’s epic road, the Crown Range.
-
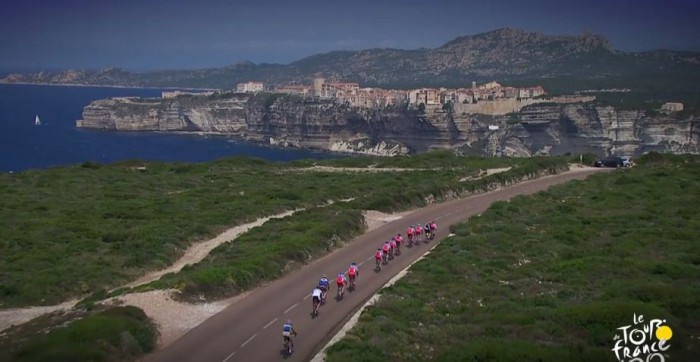
Tour de France in Corsica
In the 2013 Tour de France, three stages passed through the beautiful French island of Corsica, something that had never happened before.
-

Attention, a Life in Extremes
In “Attention, a Life in Extremes,” three exceptional adrenaline athletes are featured: Gerhard Gulewicz, a long distance cyler; Guillaume Nery, a freediver and internationally renowned wingsuit flyer Halvor Angvik.
-

Meet Janne Saario, Skateboarder (and Landscape Architect)
Janne Saario started skateboarding when he was six years old. He’s from Finland and also a budding landscape architect. In this 20-minute documentary, learn more about Janne and his relationship with architecture and skateboarding.
-

10 Most Bizarre Extreme Sports
While most people would be completely satisfied with the thrill of surfing, snowboarding or skateboarding, serious adrenaline junkies have been coming up with new and bizarre ways to get that extreme adrenaline rush. Below is a list of 10 of the most outlandish extreme sports we could think of. Bet you’ve never even heard of most of these sports!
1. Slacklining
Not to be confused with tight-rope walking, slacklining uses a wider fast mesh line that is strung slacker than a tight-rope. Much like tight-rope walking slacklining involves strong balancing skills and focus. Remember Dean Potter, the guy who highlined 6,000 feet up in the air across the Enshi Grand Canyon in China?
Slacklining has become so popular for its versatility and “slackers” ability to practice pretty much anywhere. There are a bunch of variations on slacklining which include urbanlining, tricklining, waterlining, highlining, windlining, freestyle slacklining and tunnelining.
2. Street Luge
This gravity-powered activity involves riding a street luge down a paved road or course. Ever go down a hill while sitting on your skateboard instead of standing? This sport originated in Southern California when skateboarders realized they could go much faster downhill by lying on their skateboards. Eventually someone developed a special street luge board and the sport really took off with professional competitions!
3. Volcano Surfing
Also known as ash boarding or volcano boarding, this sport involves boarding down the ashes of a volcano on a thin plywood or metal board. Riders hike up the volcano and then either stand or sit as they head back down to the bottom. This sport is actually pretty dangerous considering the volcanic ash is sharp and painful to fall on so riders are encouraged to wear protective gear while practicing. Pretty cool concept though!

4. Sky Surfing
By far one of the coolest activities on this list, sky surfing is a form of skydiving where the skydiver attaches a board to their feet and performs surf-style aerobatics during their freefall. This dangerous sport requires a substantial amount of practice and not every skydiving club permits sky surfing, but the video below of this guy sky surfing is pretty cool to watch!
5. Train Surfing
What started out as a means of transportation eventually became a form of extreme sport for daredevil thrillseekers. Train surfing first appeared as a sport in South Africa when teenagers from poor families would ride on the tops of trains for fun. Train surfers essentially risk their lives while performing tricks and dance moves on high speed trains. Train surfers face multiple risks including electrocution from overhead cables, serious injury, death and punishment by law enforcement. Below is a video of some kids in Russia train surfing.
6. Wing Walking
Wing walking is similar to train surfing except wing walkers perform on the wings of moving airplanes. The earliest known instance of wing walking began in the early 1900’s when Ormer Locklear would climb out onto the lower wings of his plane during World War I pilot training. Wing walkers then began performing stunts with the goal of constantly outdoing one another. Such insane stunts as hanging by one’s teeth, transferring planes and doing handstands were often performed!
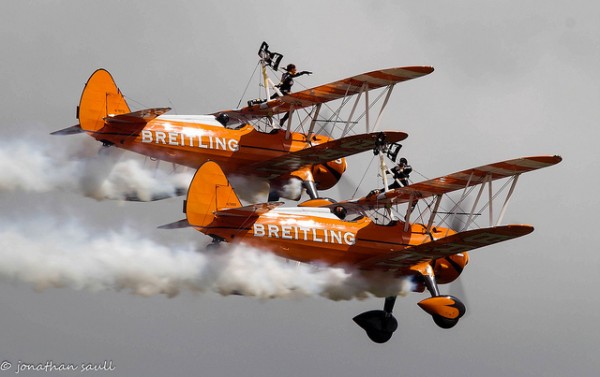
8. Trampo-Walling
Trampoline walling is pretty much exactly what it sounds like. Gravity-defying daredevils jump from heights upwards of 16 feet, land on a trampoline to bounce back up to the wall. Jumpers typically incorporate flips and twists as they go from trampoline to wall and back again. Former Cirque du Soleil performer Oliver Lemieux is one of the first to make trampo-walling a mainstream activity where people can now try in the safety of a gym.
7. Sepak Takraw
Sepak Takraw, or kick volleyball originated in Southeast Asia. Players use a rattan ball and only their feet, chest, head, or knees to score on the opponent by sending the ball over the net. Could be a fun game to start in your backyard! Check out the game video below.
9. Underwater Hockey
This bizarre underwater sport first originated in England in 1954 as a way for Southsea Sub-Aqua Club members to stay active during the cold months when open-water diving was no longer as appealing. The game, consisting of two 10-15 minute halves, calls for two teams of six to compete to move a hockey puck across the bottom of a pool to score on the opponents’ goal. The game requires players to hold their breath for long periods of time as they strive to push the hockey puck across the pool floor to score on the other team…a lot harder than it sounds! Equipment includes a snorkel, diving mask, fins, stick (also known as a “bat” or “pusher”) and a protective glove. Check out the video below of a US Women’s Underwater Hockey game!
10. Hangboarding
One day, a man named Don Arney had the random idea of combining hang gliding with snowboarding and so hangboarding was born! Hangboarders soar horizontally downhill on a hangboard which looks like this:

The “pilot” holds onto handlebars at the front of the hangboard while hanging from a T-shaped bar. The rudder at the back, where the pilot’s feet are secured, functions as a way to steer your way down the mountain as well as a brake in case you need to stop at any time.
Any sports we should add to this list?
-

McLaren P1 Extreme Testing on Ice
The McLaren P1 has been marketed as ‘the best driver’s car in the world on road and track.’ Or in this case, on a frozen lake.
-
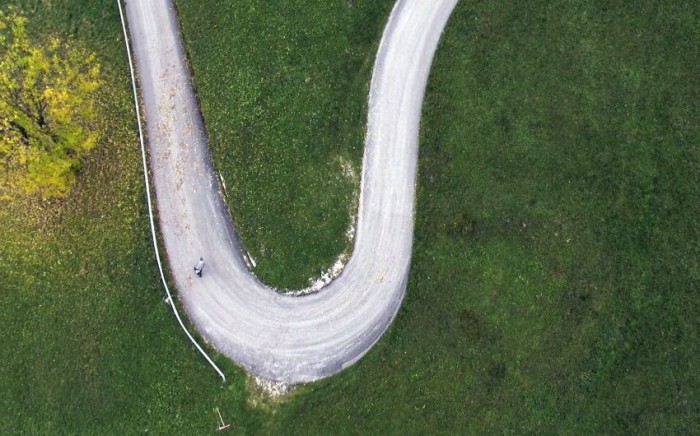
airv8 Aerial Photography Brilliance
airv8 specializes in close-range aerial photography. They use remote-controlled mulitcopters to capture their footage, and boy what an awesome point-of-view it is. In thier 2013 showreel, check out their capabilities.